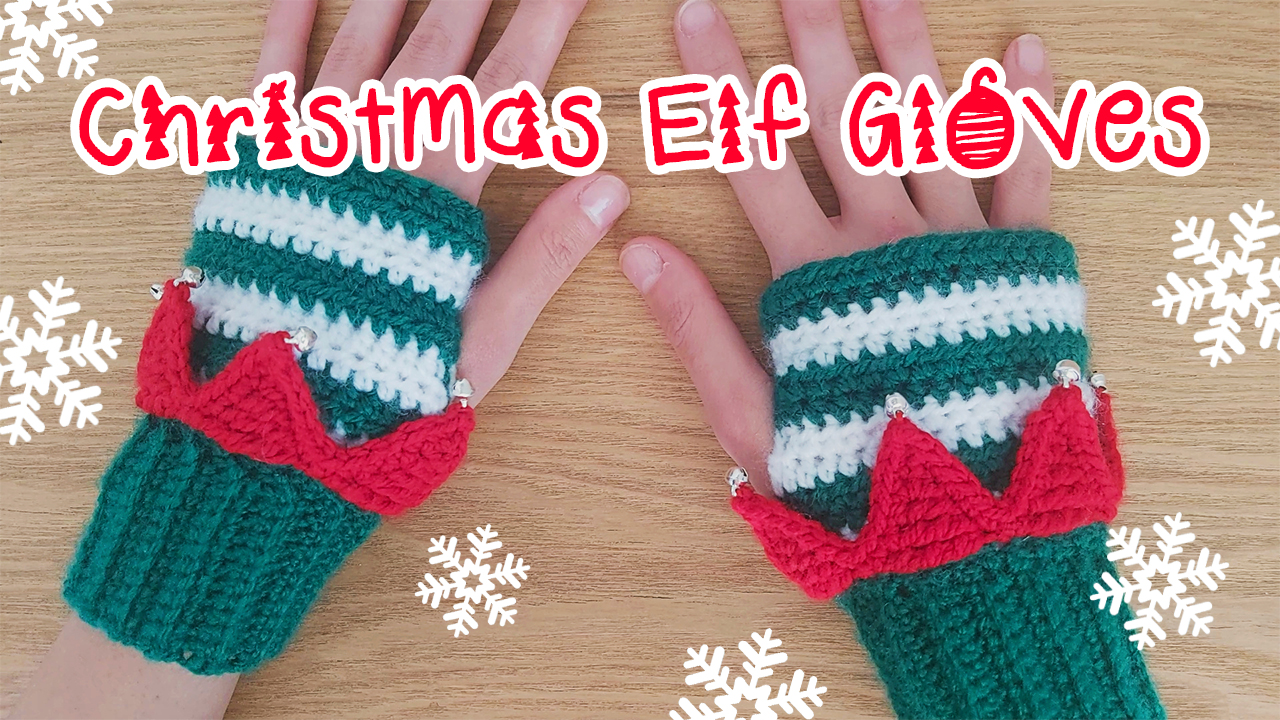
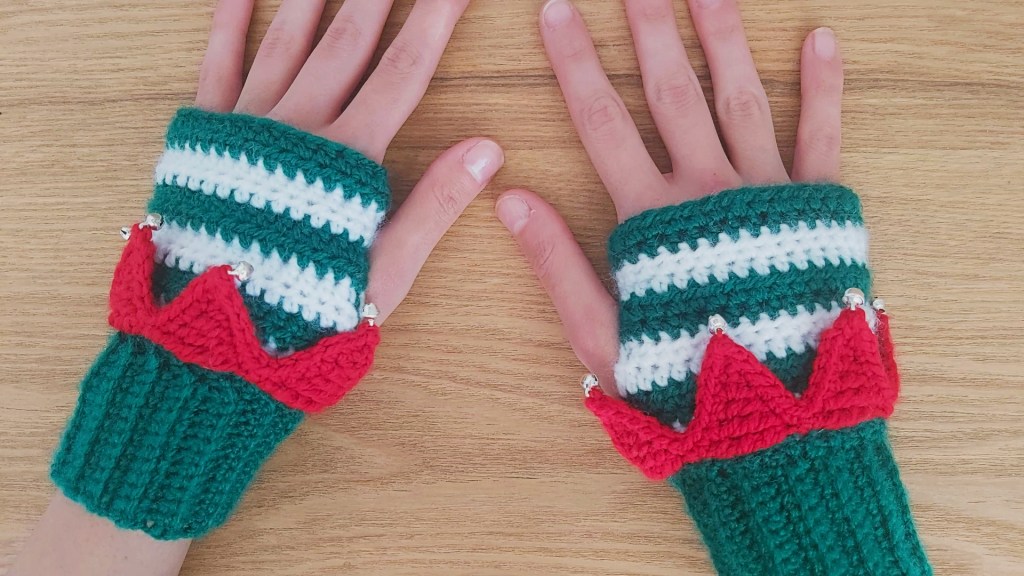
These fingerless gloves put the jingle in jingle bells!
This is definitely on the “Top 5 Favorite Things that I Have Designed” list. I have always wanted to crochet fingerless gloves, and to make them festive was the cherry on top. You can wear these all winter long and spread holiday spirit with the non-stop jingling!
Material
- Lightweight yarn in Green, White, and Red
- 4 mm crochet hook
- Needle
- Scissors
- Jingle bells (can be replaced with small yarn balls)
- Embroidery threads
Stitches Used | Abbreviations
- Magic ring (MR)
- Slip stitch (sl st)
- Chain (ch)
- Single crochet (sc)
- Half double crochet (hdc)
- Double crochet (dc)
- Triple crochet (tc)
- Double triple crochet (dtc)
- Increase (inc) – 2sc in 1 st
- Picot stitch (p) – ch3 and sl st in the back bump of the 1st ch
- BLO – Back Loop Only
- FLO – Front Loop Only
- * * – repeat sequence
Notes
- The ch2 while working the glove section counts as a hdc.
- The number at the end of each row in () indicates the number of total stitches.
Pattern
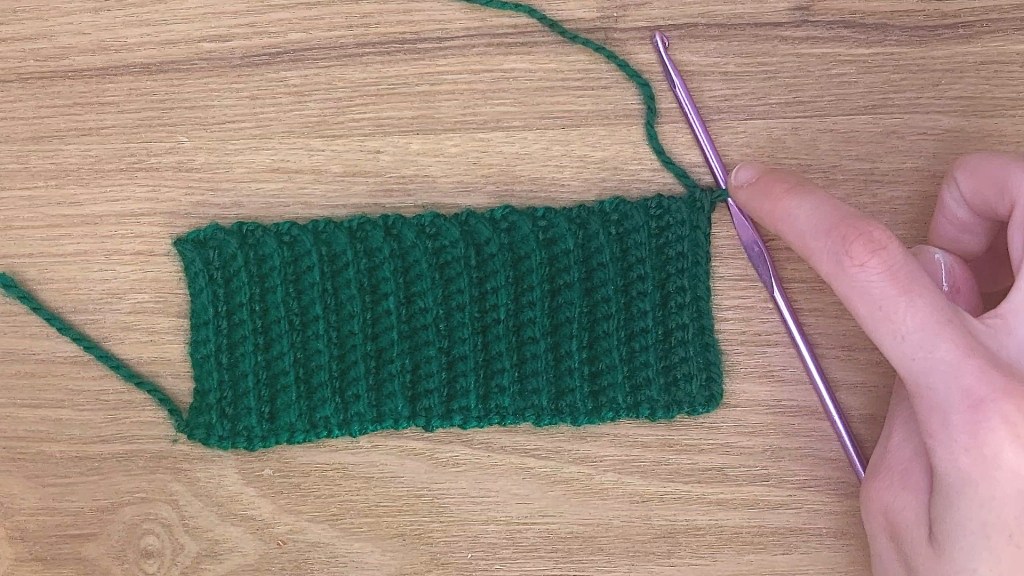
Start off with the ribbing
- Ribbing
Using the Green Color
Row 1: sl knot, ch13, *sc* across (12)
Row 2-28: *sc* across BLO (12)
The ribbing is meant to cover the circumference around your wrist. If you wish to make the ribbing smaller/bigger around your wrists, remove/add rows.
Turn the work to your right to start crocheting across the 28 rows.
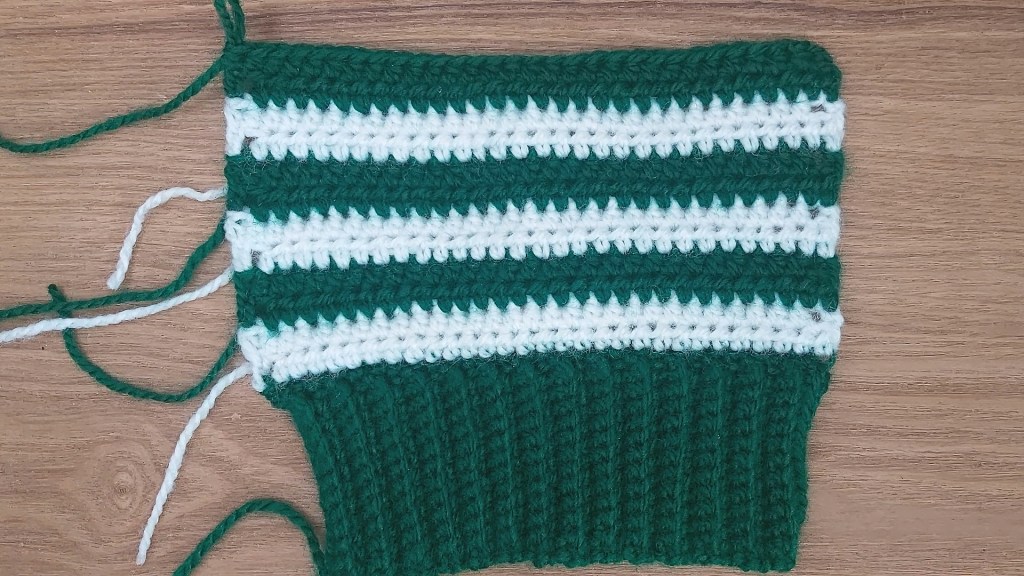
- Glove
Row 1: inc, 26sc, inc (30), change color to white
[if you alter the size of gloves, make sure you end row 1 with a stitch count that is a multiple of 5. If not, your triangular edges will need altering as well and might not end up look exactly the same]
Row 2: ch2 (count as a hdc), *hdc* all across BLO (30)
Row 3: *hdc* all across (30), change to green
Row 4-13: *hdc* all across (30), change color every 2 rows.
Keep your hoop in the last stitch and do not cut your yarn.
Weave all the ends from the color changes.
- Stitching the Glove
Fold the glove in half and align the two sides while making sure the front loops that you have not stitched in yet are on the inside.
Ch1 and sl st across the first 4 rows by going into both sides of the gloves, skip 6 hdc rows (sl st in 1 side of the glove), sl st across both sides until you reach the end of the ribbing.
The 6 hdc row space is meant for the thumb. You can make it bigger or smaller based on how many rows you stitch in both sides and how many rows you do not.

Cut the yarn and finish off. Weave in your ends.
Fold your golve inside out.
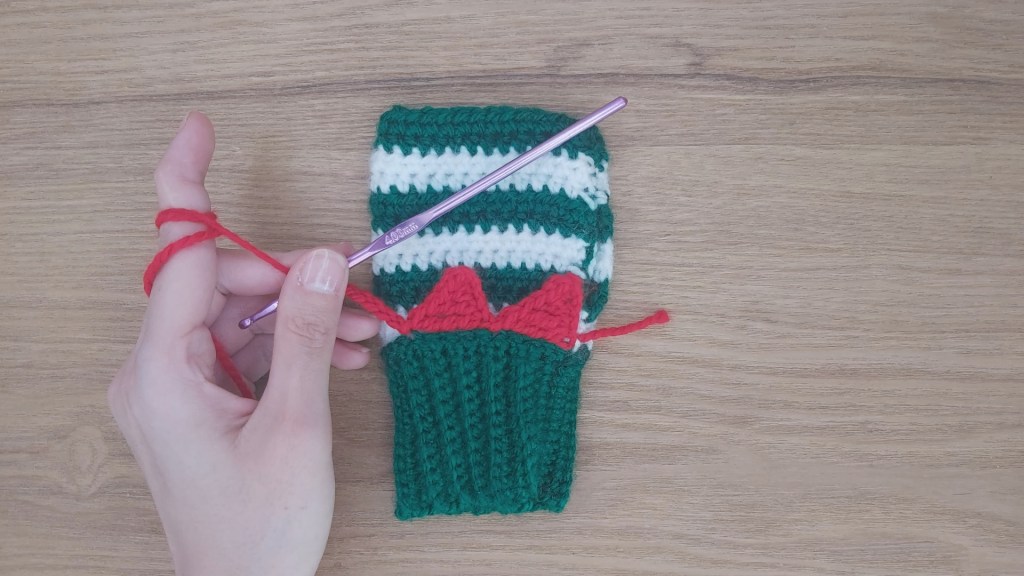
- Triangular Edging
Using the red yarn
Start at the front loop of row 1 of the Glove
Insert your hook into the 1st front loop from row 1 of the glove, and pull the red yarn.

Round 2: *ch6, sc, hdc, dc, tc, dtc, skip 4, sl st* all around (66)
Round 3: 5sc, [p, 11sc]x5, p, 6sc
Cut the yarn and finish off.
- Jingle Bells
Using an embroidery thread, secure the thread on the inside of the triangular edge. At the picot stitch, attach your jingle bells and then secure the thread and weave it in on the inside of the triangular edge.
If you do not want your gloves to make sounds all the time, you can attach small yarn balls instead.
Aaaand the gloves are done and you are ready to spread holiday cheer!
If you enjoyed this pattern, let me know in the comments below, and make sure to share your creations on Instagram @MoreThanKnots.
A tutorial is also available on my YouTube channel!
