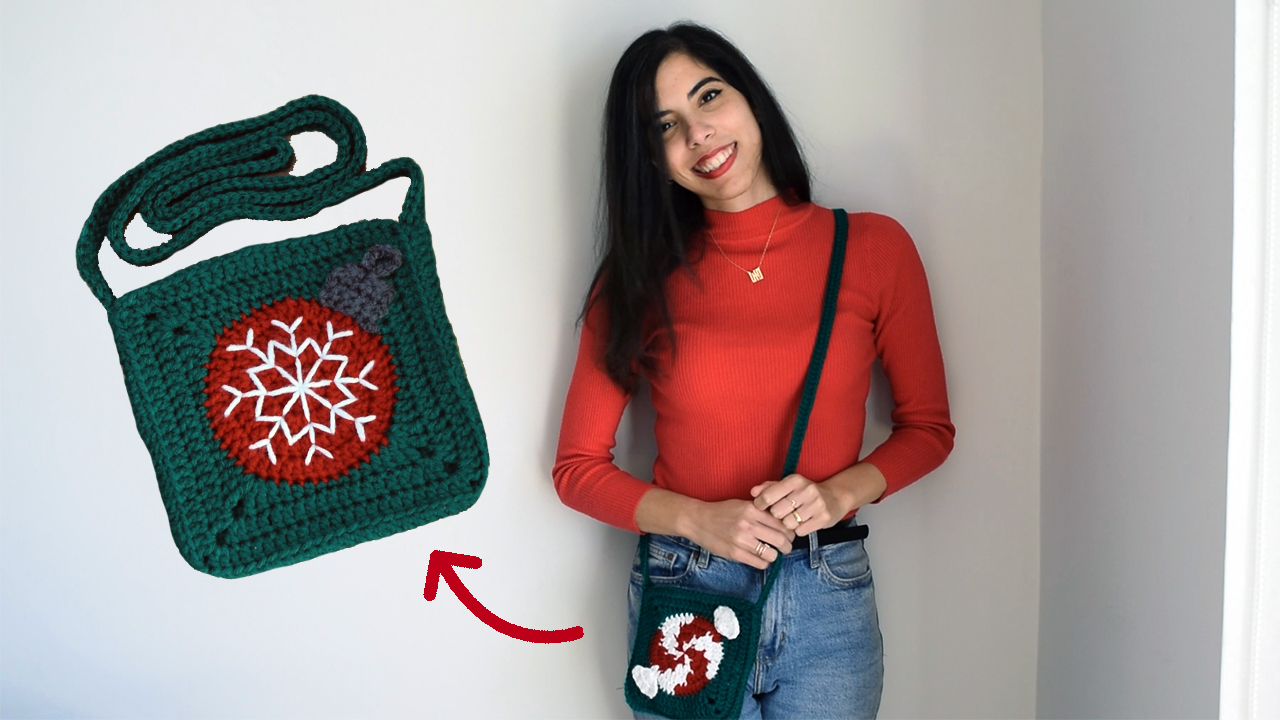
HO HO HO-w adorable is this bag??
This is the perfect bag to crochet this holiday season! It is fun, easy, and very festive! I love cross bags so much because you can grab it to go while you run errands, you do not have to worry about putting it down, and they look cute!
Since cross bags are a favorite for me, I had to make one. And what is better than a cross bag? A CHRISTMAS THEMED CROSS BAG. My favorite part about this bag is that it has a different design on each side which you can alternate and enjoy both. Double the festivity!
Material
- Medium weight yarn in Red, Green, Gray, and White
- 5 mm crochet hook
- Scissors
- Needle
- Magnetic clasps (optional)
Stitches Used | Abbreviations
- Magic ring (MR)
- Slip stitch (sl st)
- Chain (ch)
- Single crochet (sc)
- Half double crochet (hdc)
- Double crochet (dc)
- Triple crochet (tc)
- Double crochet increase (dc inc) – 2 dc in 1 st
- BLO – Back Loops Only
- * * – repeat sequence
Notes
- The ch2 at the start of each round does not count as a dc.
- When you sl st at the end of the round, sl st in the 1st dc.
- The number at the end of each row in () indicates the number of total stitches.
Pattern
- Christmas Tree Ornament Square
Square
Using the Red yarn
Round 1: MR, ch2, 12dc inside MR (12)
Round 2: ch2, *dc inc* all around (24)
Round 3: ch2, *dc, dc inc* all around (36)
Round 4: ch2, *2dc, dc inc* all around (48)
Either color change to green at the last double crochet of Round 4, or finish off using the invisible stitch and attach the green yarn.
Round 5: ch1, *3sc, 2hdc, 2dc, [2tc, ch2, 2tc] in the same stitch, 2dc, 2hdc* all around (68)
Round 6: ch2, *dc* all around and [2dc, ch2, 2dc] in the corners (84)
Round 7: ch2, *dc* all around and [2dc, ch2, 2dc] in the corners (100)
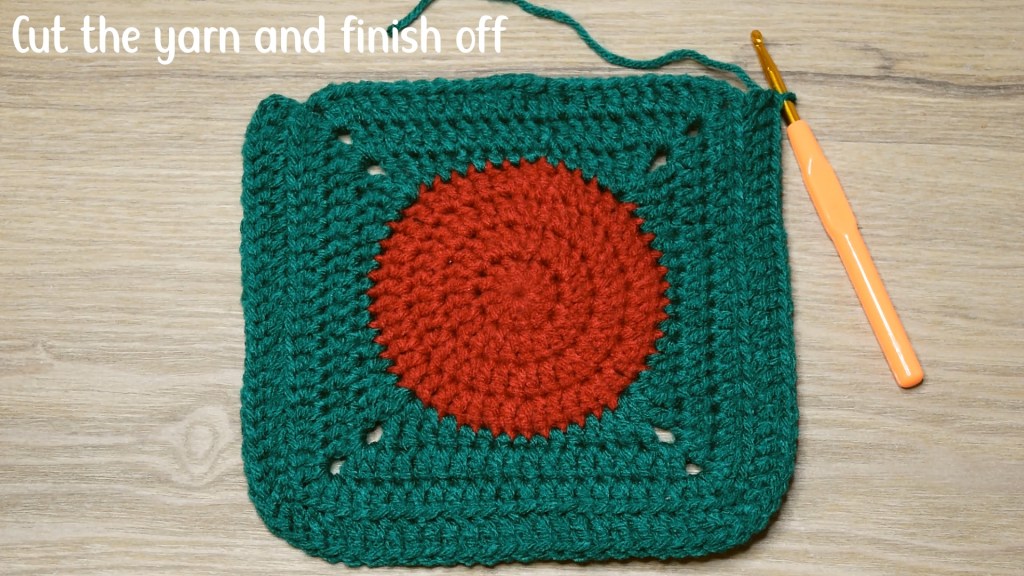
Cut the yarn and finish off.
Attach the green yarn in one of the chain corners (each corner has 2 chains, attach the yarn to the chain closest to your left – so that as you crochet you will not be crocheting into that other chain)
Round 8: ch3 (which will country a dc crochet), 74dc all around BLO (75)
You will not crochet in the BLO the last side of the square, because this side is going to be the top of the bag (aka where you access the bag)
Cut the yarn and finish off.
Hanger
Row 1: sl st, ch6, *sc* across (5)
Row 2-3: *sc* across (5)
Row 4: 2 sl st, [sl st, ch10, sl st] in the stitch, 2sl st
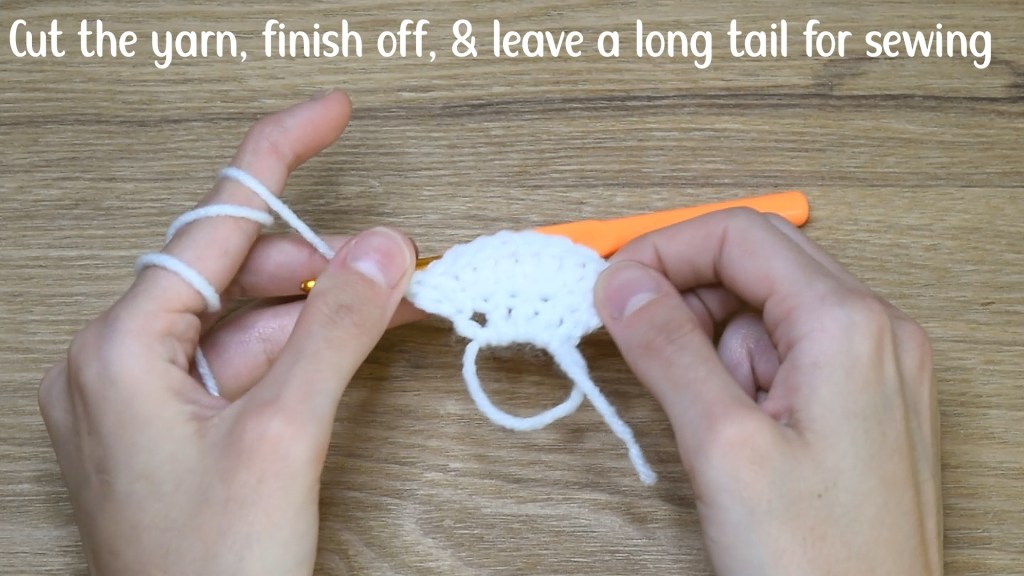
Cut the yarn, pull the yarn through the stitch, and leave a long for sewing.
Stitch the hanger to the top corner of the square.
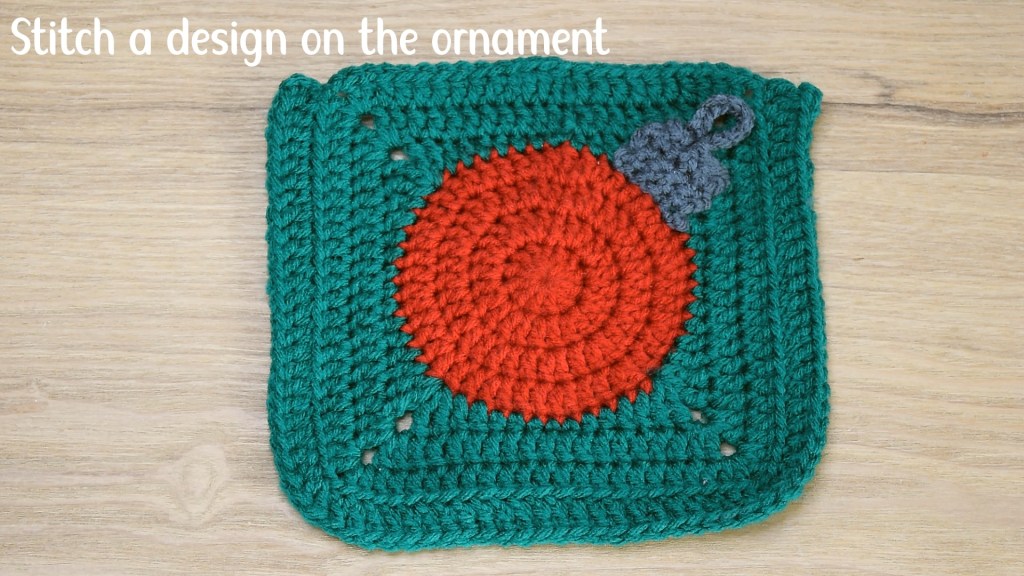
You can also stitch some designs on the ornament to make it more festive and add colors.
- Christmas Peppermint Candy Square
Square
For the upcoming Rounds, a color change refers to changing colors from red to white or white to red. You are going to alternate between the two colors throughout Round 1-4.
Starting with the red yarn
Round 1: MR, ch2, [2dc, change color]x6 (12)
Round 2: ch2, dc inc, [change color, 2dc inc]x5, change color, dc inc (24)
Round 3: ch2, dc, [change color, [dc inc, dc]x2 ] x5, change to red, dc inc, dc, dc inc (36) , change to white
Round 4: ch2, 2dc, dc inc, 2dc, [change color, dc inc, 2dc, dc inc, 2dc]x5, change to white, dc inc (48)
Either color change to green at the last double crochet of Round 4, or finish off using the invisible stitch and attach the green yarn.
Round 5: ch1, *3sc, 2hdc, 2dc, [2tc, ch2, 2tc] in the same stitch, 2dc, 2hdc* all around (68)
Round 6: ch2, *dc* all around and [2dc, ch2, 2dc] in the corners (84)
Round 7: ch2, *dc* all around and [2dc, ch2, 2dc] in the corners (100)
Cut the yarn and finish off.

Candy Wrapper x2
Round 1: MR, ch3, 4dc in MR (5)
Round 2: *dc inc* all across (10)
Stitch the candy wrappers on two corners of the square facing each other.

- Stitching the Bag
Align the two square back to back Insert your hook into the left corner (ch closest to the your left) in the front loop. Pull the green yarn through the loop and ch1. Then insert your hook back again into that front loop of the first square, then into the back loop of the second square and sl st. Repeat sl st across the entire three sides of the bag. Cut the yarn and finish off.
- Bag Strap
Insert your hook into of the side corners
R1: ch160 (or the length of your choice), ch3 and dc in the 5th ch away from the hook, *dc* across (160)
Cut the yarn and pull it all the way through. Then with a needle stitch the strap to the rest of the side.
Using a needle a short piece of green yarn, secure the yarn on the inside of the bag, and stitch the second side of the strap to the second side of the bag.
Aaaaaand the bag is done!

If you enjoyed this pattern, let me know in the comments below, and make sure to share your creations on Instagram @MoreThanKnots.
A tutorial is also available on my YouTube channel!

Leave a comment