
Hands down the cutest phone pouch EVER!
The best part about this phone pouch is the mushroom cover which not only is cute but also closes the phone pouch.
Aside from the phone pouch being extremely cute, it is very useful for when your outfit has small pockets and you don’t want to throw your phone inside the vortex that we call a bag.
The patten is simple and great for beginners.
Material
- Medium weight yarnbyarn
- 5 mm crochet hook
- Scissors
- Tapestry needle
Stitches Used | Abbreviations
- Slip Knot
- Magic Ring (MR)
- Chain (ch)
- Slip stitch (sl st
- Single crochet (sc)
- Half double crochet (hdc)
- Half double crochet increase (hdc inc) – 2hdc in 1 st
- * * – repeat sequence
Notes
- Ch1 at the start of each row/round. The ch1 does not count as a stitch.
- When working in continuous rounds, you do not join the rounds with a slip stitch, you just continue stitching to the next round.
Pattern
- Mushroom Step (aka Pouch)
Round 1: slip knot, ch11, hdc in the 2nd ch away from the hook, 8hdc, 4hdc in 1st, 8hdc, 3hdc in the same st (24), sl st
The first 10 chains should cover the width of your phone. If you wish to make it wider, add addtional chains.
Round 2: ch1, turn, *hdc* all around (24)
Round 3-19: Repeat Round 2 until you reach the length of your phone
At the start of each round, you will ch1 and turn so that you are crcoheting in a different direction. One round will be clockwise whereas the one after will be anti-clockwise. This way, the seam that is created by the slip stitches will end up being straight instead of being skewed.
Once you are done, do not cut the yarn. Continue to create the handle of the pouch.

- Handle
Row 1: ch161, *sc* across (160)
If you wish to make your handle short/longer, remove/add chain.
Cut the yarn and leave a long tail. Using the tail of your yarn, connect the chain to the first corner of the pouch.
Before connecting the other side of the handle, you will need to finish the top cover of the mushroom pouch.
- Mushroom Cap
Round 1: sl knot, ch11, hdc in the 2nd ch away from the hook, 8hdc across, [2hdc + ch2 + 2hdc], 8hdc, [2hdc + ch2 + hdc] (28)
You will move continue crocheting this part in continuous rounds (without joining at the end of the round)

Round 2: 10hdc, hdc inc, 2hdc in the ch2 space, hdc inc, 10hdc, hdc inc, 2hdc in the ch2 space, hdc inc (32)
Round 3-8: *hdc* all around (32)
Cut the yarn and finish off

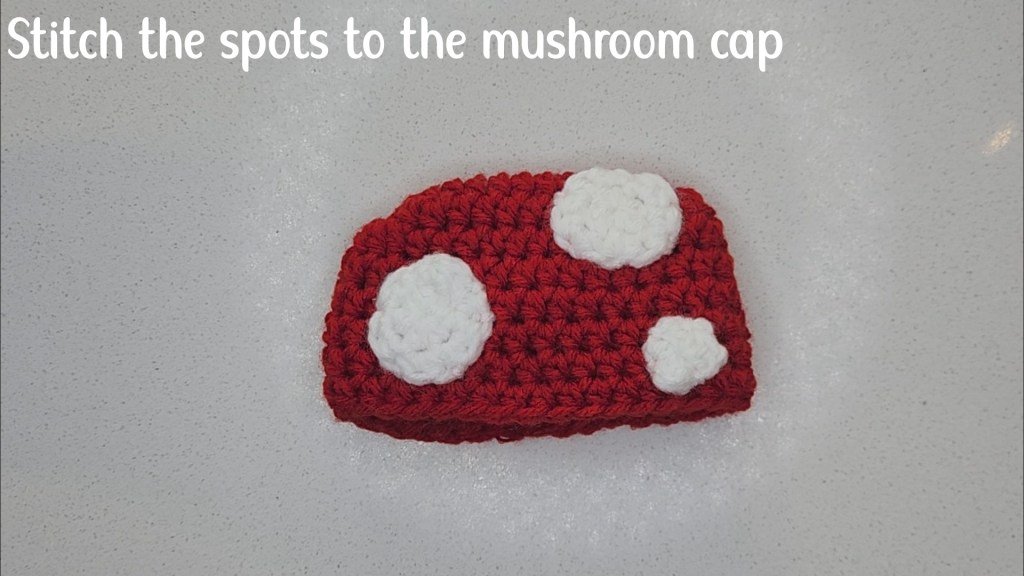
- Mushroom Spots
The spots are worked in continuous rounds. At the end of each one, cut the yarn and leave a long tail for sewing.
Small x2: MR, 6hdc in MR
Medium: MR, 8hdc in MR
Large x3:
Round 1: MR, 6hdc in MR (6)
Round 2: *hdc inc* all around (12)

- Assembly
Stitch the mushrooms spots onto the mushroom head using the tails.
Pull the handle through the “ch2” spaces that you did in Round 1 of the mushroomcap and then stitch it on the other side of the pouch. Make sure the handle is not twisted before you stitch it to the pouch.
Aaaaand you’re done!
If you enjoyed this pattern, let me know in the comments below, and make sure to share your creations on Instagram @MoreThanKnots.
A tutorial is also available on my YouTube channel!

Leave a comment