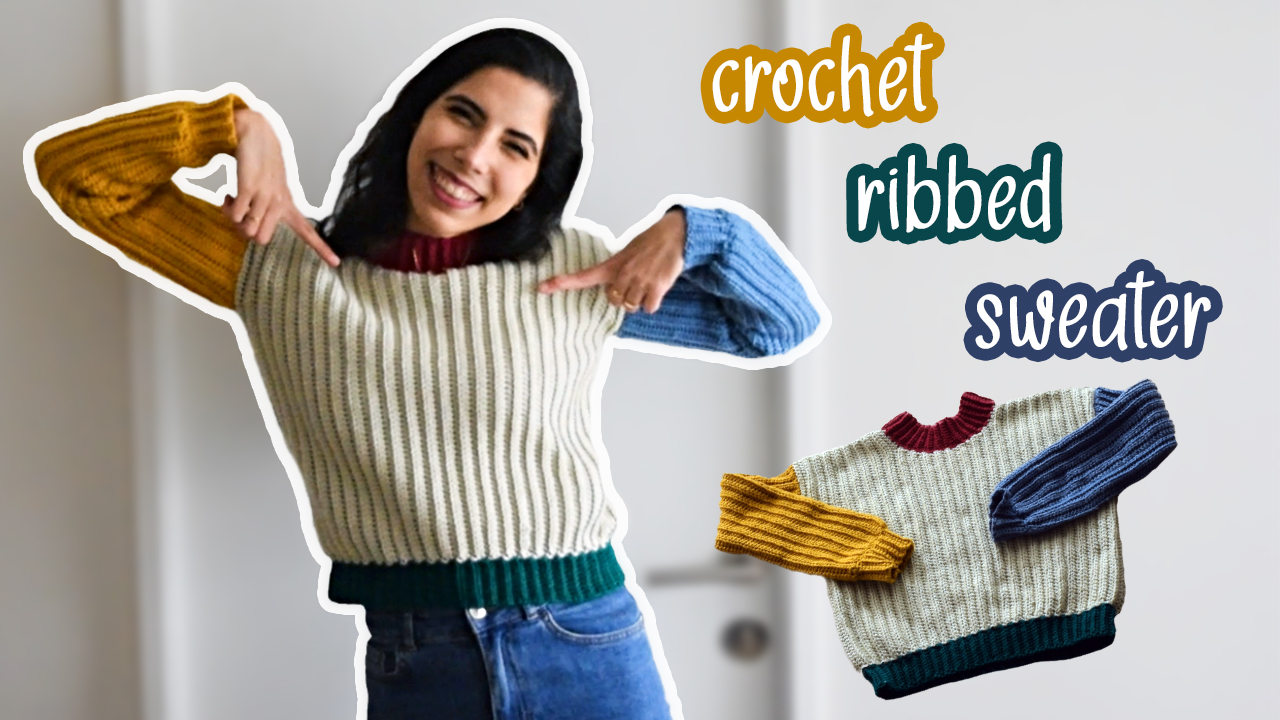
My new moto is, why buy a sweater when you can crochet one yourself?!
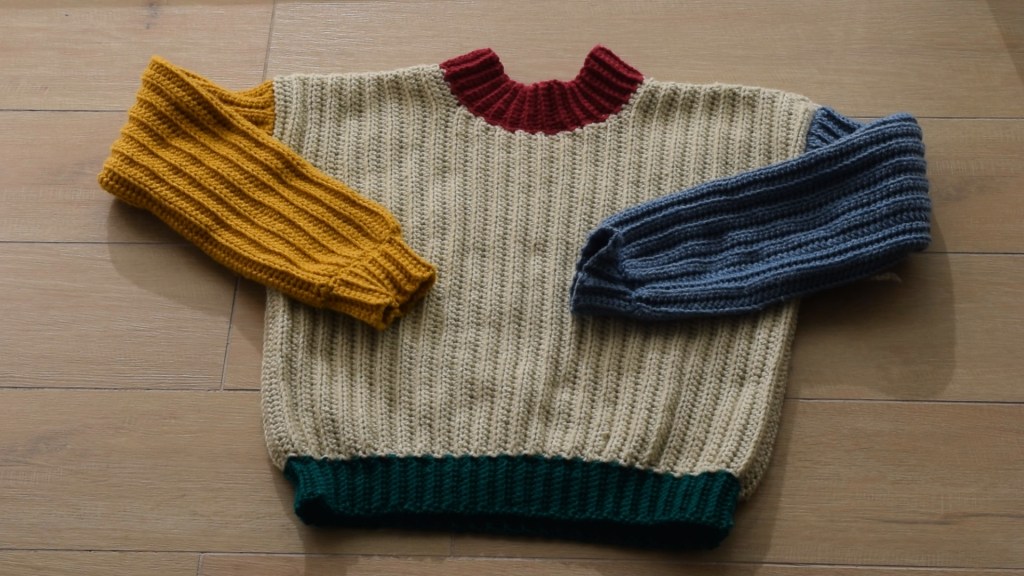
I wanted to crochet a sweater that was kind of unique, but also fun; hence the color-blocking. In all honestly, I originally planned to only have the sleeves in different colors, but I ran out of yarn for the collar and ribbing and did not want to wait till I ordered new ones online. But I love the end result even more this way!
Material
- Yarn ~600g
- 5 mm crochet hook
- Darning needle
- Scissors
Stitches Used
- Slip knot (sk)
- Slip stitch (sl st)
- Chain (ch)
- Single crochet (sc)
- Half-double crochet (hdc)
- Half-doucle crochet increase (hdc inc: 2 hdc in 1 stitch)
- Half-double crochet decrease (hdc dec: 1 hdc in 2 stitches)
- Back loops only (BLO)
- * * – repeat sequence
Notes
- The number at the end of each row in () indicates the number of total stitches.
- Ch1 when going from one row to another when doing sc.
- Ch2 when going from one row to another when doing hdc. The ch2 does not count as a stitch.
Design
The sweater is designed to be a bit cropped and to be worn on high-waist pants. You can add length to the sweater if you wish to make it longer. It is made up of the following parts:
- Front panel
- Back panel
- Sleeves x2
- Cuffs x2
- Collar
- Bottom Ribbing
Measurements
The below pattern matches my personal measurement (I wear usually wear size XS/S). However you can definitely adjust it if you want. You can add stitches to increase the length of the sweater as well as add rows to make it wider.
Pattern
- Front and Back Panel
Row 1: sk, ch76, starting from the 3rd chain away from the hook, *hdc* all across (74)
Row 2-18: *hdc* all across BLO (74)
Row 19: 64hdc, hdc dec BLO (65)
Row 20: hdc dec, 63hdc BLO (64)
Row 21: 62hdc, hdc dec BLO (63)
Row 22: hdc dec, 61hdc BLO (62)
Row 23: 60hdc, hdc dec BLO (61)
Row 24-28: *hdc* all across BLO (61)
Row 29: 60hdc, hdc inc BLO (62)
Row 30: hdc inc, 61hdc BLO (63)
Row 31: 62hdc, hdc inc BLO (64)
Row 32: hdc inc, 63hdc BLO (65)
Row 33: 64hdc, hdc inc (66) BLO, ch10, turn
Row 34-51: *hdc* all across BLO (74)
Finish off and weave in loose ends.
- Sleeve x2
Row 1: sk, ch76, start from the 3rd chain from the hook, *hdc* all across (74)
Row 2-30: *hdc* all across BLO (74)
Finish off and weave in loose ends.
- Cuff x2
Row 1: sk, ch11, start from the 2nd chain away from the hook, *sc* across (10)
Row 2-28: *sc* across BLO (10)
Finish off and leave a long tail for sewing.
Fold the cuff in half, align the beginning row and the end row together, and sl st across to close the cuff.
If you want your cuffs to be wider around the wrist, add more rows.
- Stitching the Sweater
When stitching, you are going to be working on the inside of the sweater. This way when you are done, you would turn it inside out and none of the stitching will show.
Align the two panels and sew the top of the shoulders together by slip stitching excluding the neck part (a total of 20 stitches on each side).
Lay the two panels flat on a surface, and then lay the two sleeves while wide open in the middle of each side. Attach the sleeves to the panels by slip stitching the sides. Then fold the back panel on top of the front panel and sl st the sides and the sleeves.
- Collar
Make sure you are working on the outside of the sweater when crocheting the collar and bottom ribbing.
Attach the yarn to the first stitch near the top of the shoulder
Row 1: ch11, *sc* across (10), 2sl st in the next two stitches in the neckline, turn your work around and skip the 2sl st that you just made
Row 2: *sc* across BLO (10)
Row 3: *sc* across BLO (10), 2 sl st, turn, skip the 2sl st
*repeat Row 2 and 3* all around the neckline
- Bottom Ribbing
Repeat the same pattern you did for the collar, but this time to the bottom of the sweater.
If you enjoyed this pattern, let me know in the comments below, and make sure to share your creations on Instagram @MoreThanKnots.
A tutorial is also available on my YouTube channel!

Leave a comment